REMINGTON 870, 20-GAUGE SHOTGUN BUILD

Build details
By GrevB, NnF000
We can call this a “Tactical Build” or a “Home Defense Build” or maybe just “Building a REM870, 20-ga… My Way” !
Please Note that I am not going to tell you how to disassemble or assemble your Shotgun, I leave that to people on this Site that know a lot more than I do about the Remington 870 Express. I will call out the parts and part numbers (P/N:) where I known, and give a short review.
Vendors that supplied parts or considerations for this build:
1) Spitfire Armory, Front and Rear Sights;
Rear Sights – https://spitfirearmory.com/products/ghost-ring-ex-rear-sight/
Front Sights – https://spitfirearmory.com/products/ex-tactical-snub-front-sight-st/
2) CDM Gear – Mag Tube Extension Support with Side-rails (BMT Light Mount with or without Rail)
3) West Coast Armory – Cerakote, Gunsmith, Contact them by Phone
Other Vendors/Part used:
1) Stock – Phoenix Technology, Kicklite, Adjustable
2) Heatshield – ATI, Halo Heatshield, Metal 12-ga modified
3) Remington – Extension Tube, Ext Tube Nut, and 18” Barrel
4) Hogue Rubber Over Molded Forend – Hogue
5) 20-ga Universal No-Jam Follower, Follower Spring – S&J Hardware
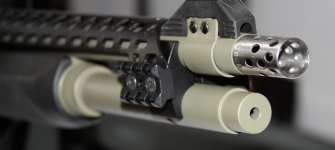
6) Choke – Kicks Ind
7) Barrel Machining – R&D Custom Barrel Service, www.americhoke.com
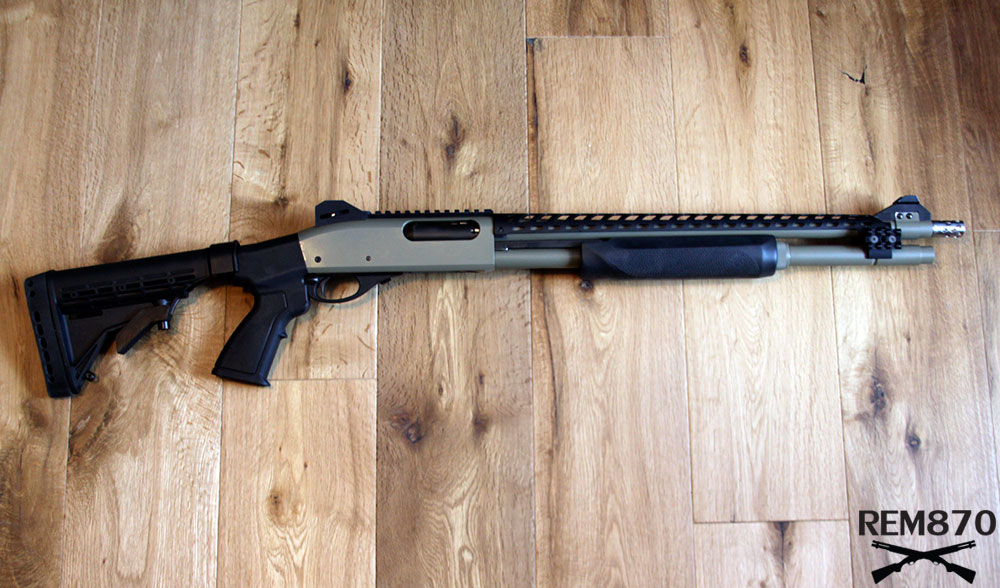
20 Gauge Remington 870 for Home Defense
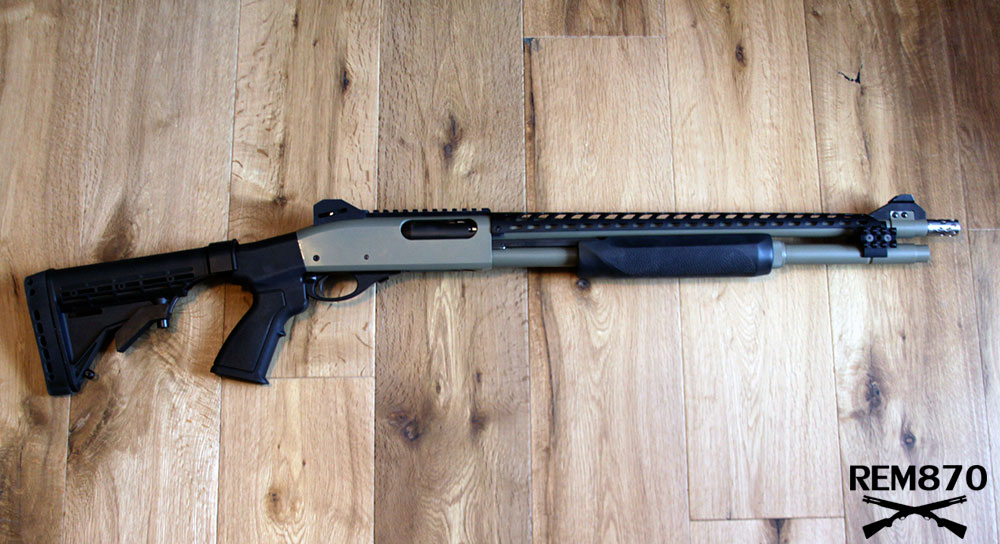
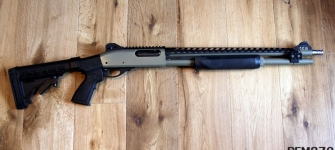
The Completed 20-ga Remington 870 Shotgun after rebuild, Olive Drab – Cerakote with Black Accessories.
All of the accessories, although thought of as unnecessary, make this gun a lot easier to handle and easier to shoot. What more can you ask for “The Wife likes it” !
The Build starts out purchasing a Shotgun for Home Defense, I believe Remington to be one of the best Shotguns so the decision was easy… an 870, but I didn’t need a 12-gauge, a 20-ga – Express will do. As it turned out it was a junior model with a 21” barrel.
I got it, shot it, what a great gun, shoots quickly and accurately.
As most people these days I search the Web WAY too much ! Locating all kinds of Shotgun Accessories along with other things. The list was started with parts that would look good, Defense, Tactical, just about anything that looked the way I wanted it and someday would buy but we all know what happened next, as my wife calls it, we had the “Truck-a-Day Club” arriving with parts for my new Shotgun.
I started with a Remington 18” Barrel, P/N: F400436, thinking the size was better for home defense, shorter and easier to handle around the house. At the same time an order was placed for a 2-rd Mag Extension Tube, P/N: F400683, and Nut, P/N: F400424. Next safety wise, a heat shield would save a burn or two, wait a minute; just how many rounds would I fire at an intruder to heat up the barrel enough to worry about… didn’t matter, I wanted it and would get it later if I found the right price.
It was then decided to make this Shotgun more friendly for my wife to shoot, just in case; the next step was to shorten the rear of the gun to fit her torso… an adjustable stock would work for both of us.
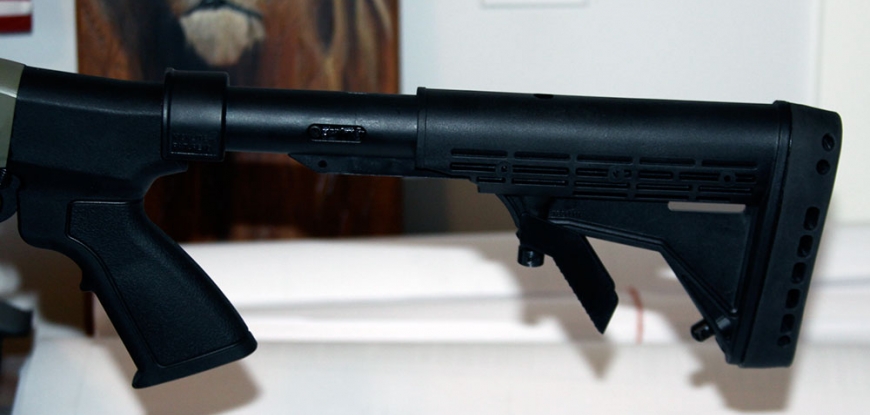
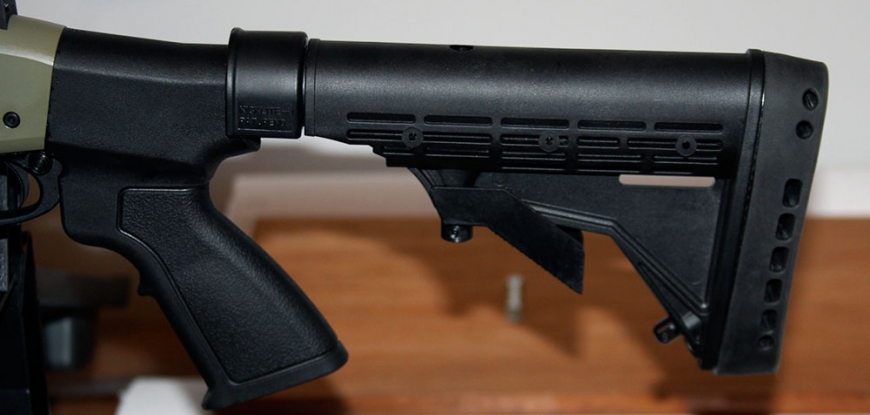
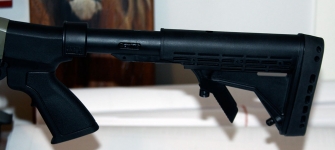
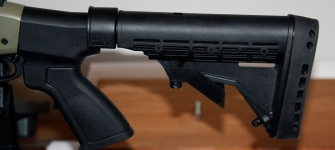
Off again to the Web and I found numerous stocks that fit the 20 gauge and settled on the Phoenix Technology Kicklite Unit, Model # KLT007, it fit the overall package and it feels good when shooting. It comes with the recoil reducer (Kicklite) build in and a recoil pad that is very soft and would help even more than the Kicklite feature. To my wife’s and my surprise the Stock reduced the kick to more of a heavy backwards push than a kick back; good… I made a home run there. Also, this Stock was purchased on Amazon.com, great price, quick shipping!
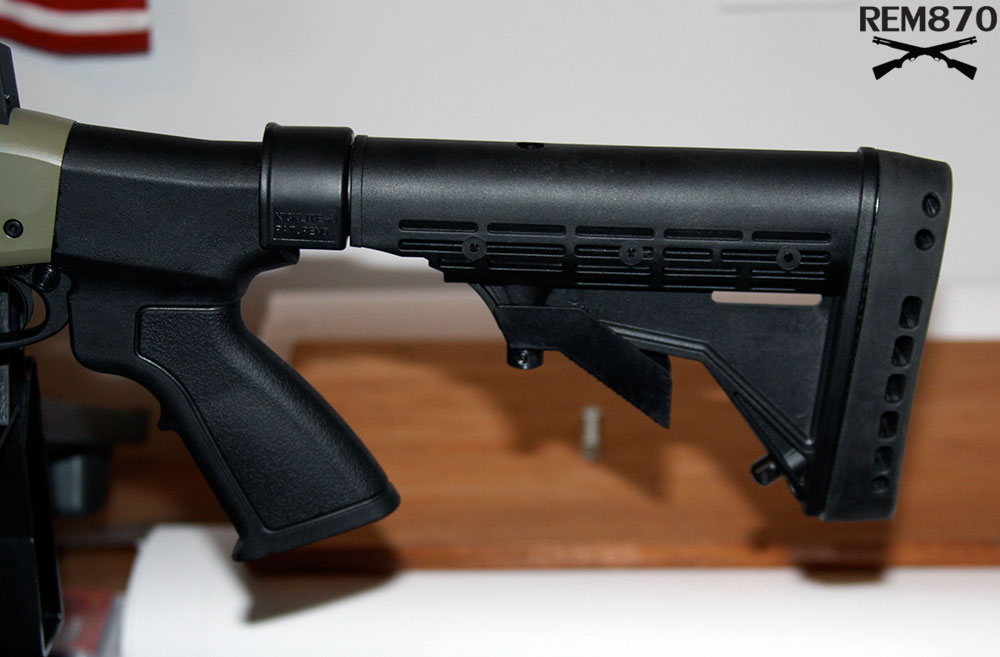
20 Gauge Remington 870 for Home Defense
The above and below pictures show the Phoenix Technology, Kicklite, Adjustable Stock, KLT007, for the 20-ga REM870, collapsed and extended. It fits well, easy to install, and feels great when shooting. There is a location for a Shoulder Strap and as you can see in the bottom picture it has a lot of adjustment to fit my long position and my wife’s short position.
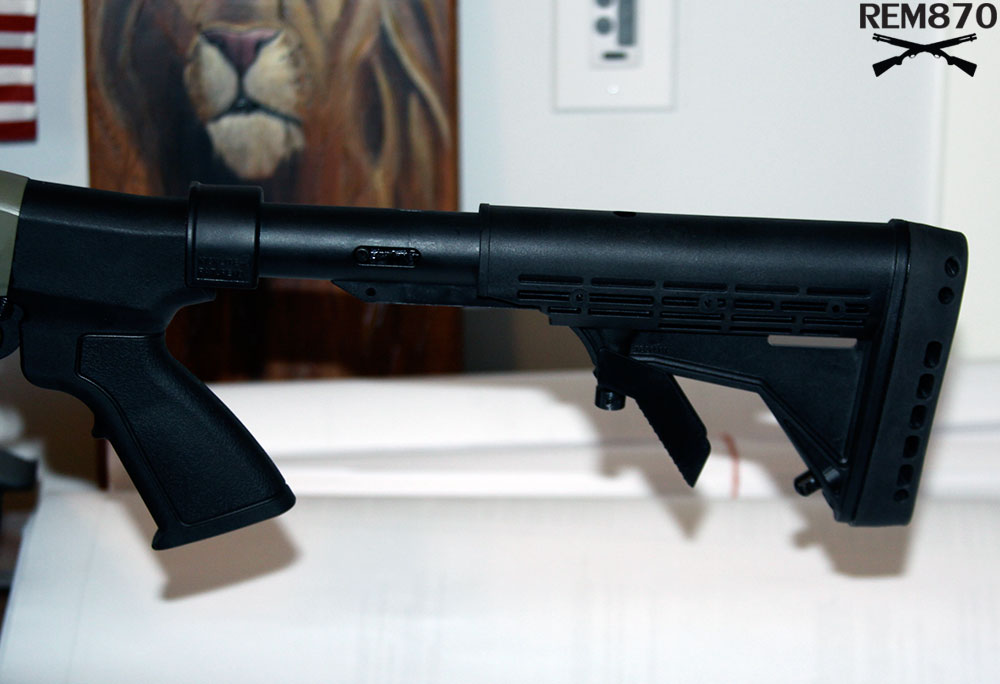
20 Gauge Tactical Remington 870
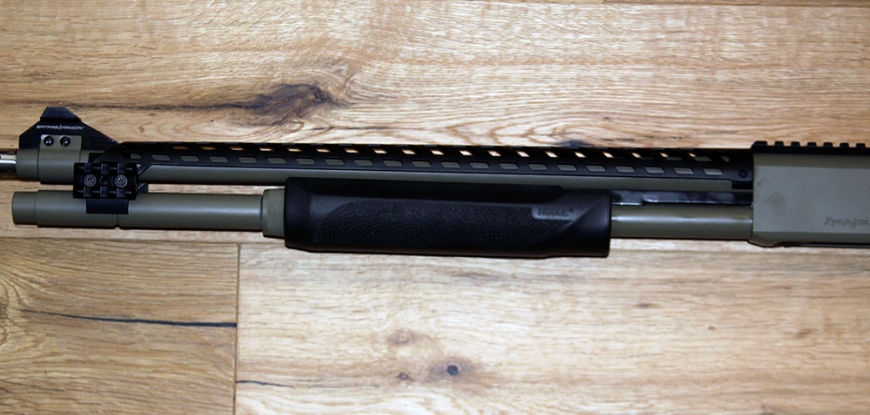
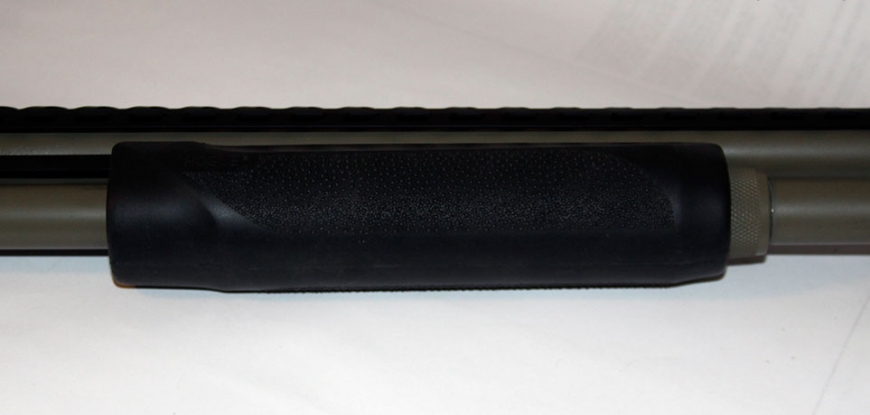
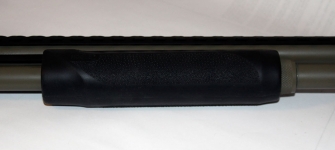
Next came the Hogue Rubber Over Molded Forend, P/N: 08737, not a must have but it is sweet to grab and know your hand isn’t going to slip when chambering a round. This piece felt great, just soft enough to get a good grip and again the wife liked it. The part itself was well made, no sharp ends, no loose pieces of the rubber over-lay, fit the 20-ga and worked !
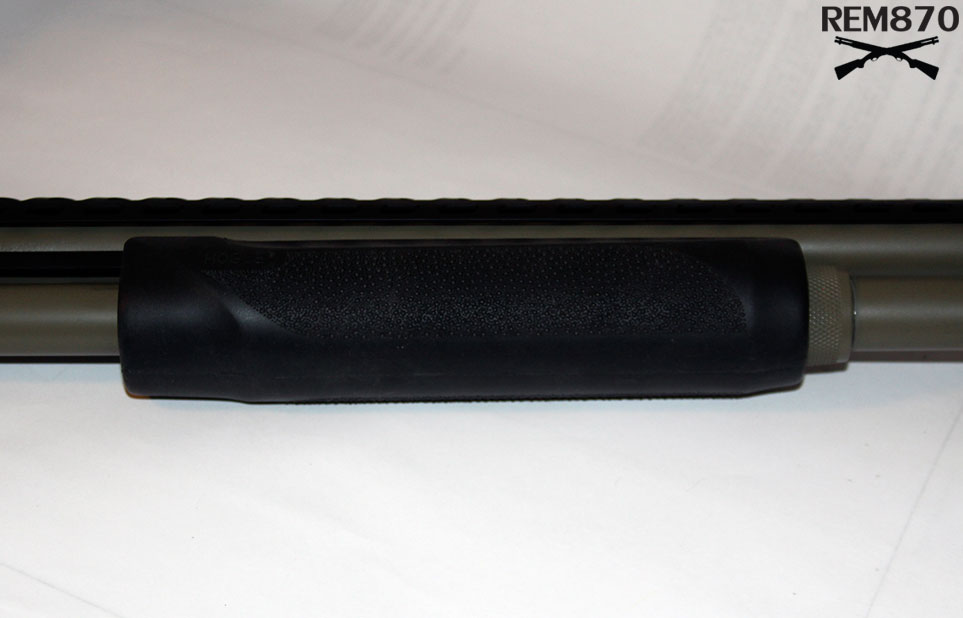
20 Gauge Tactical Remington 870
Hogue Rubber Over Molded Forend, good grip, feels easier to chamber a round, gives a good look.
Had no problem installing this piece, almost a slide in but again I am a novice and I had to work it a little, finally got it together only to pull it out again for Cerakote.
When test fitting the Hogue Foreend it installed easily, the OEM Foreend almost fell out, surprise, and the new unit took a little wiggling but it slipped back in place without too much effort.
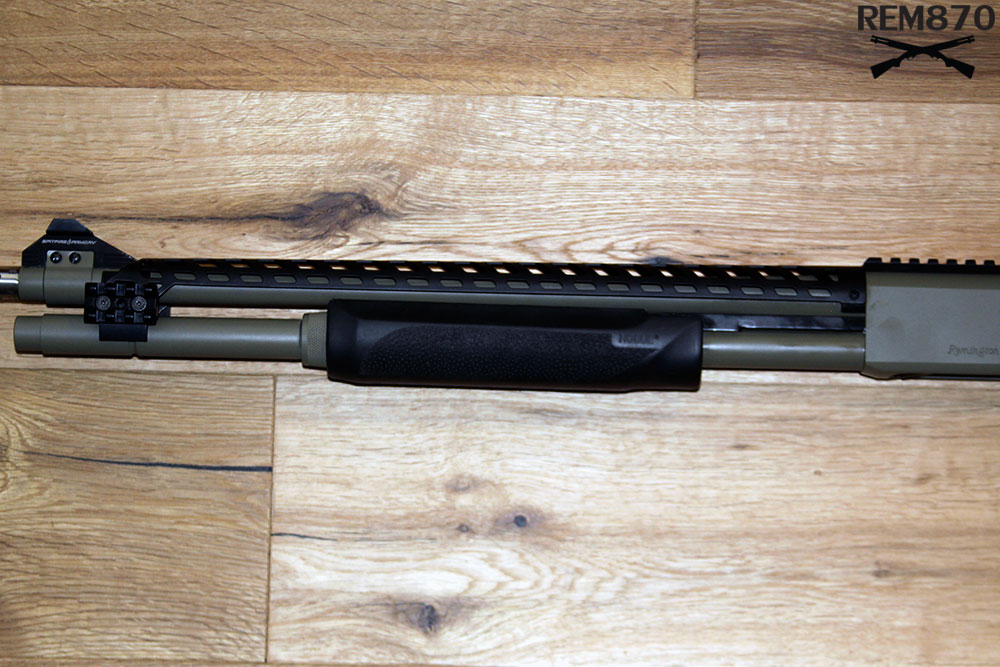
As the build went on a decision was made to make what I call a Tactical Looking Shotgun; I wasn’t going to crawl through the bush or do any precision shooting but just something to impress someone just by looking at it, right… we all kind-of want that. I started the search for a heatshield that should give it the look I was wanted, only to find out again there are no heat shields for a 20-ga shotgun. I looked at the 12-ga ATI Halo Metal Heatshield, among others, liked the look of it, and found one locally to test fit it to my 20-ga. It turned out to be as expected a loose fit but not that loose, I could mold the mounting ring easily, and it appeared that the metal on the Heatshield, although thick, moved when I applied pressure. The Heatshield was purchased and I proceeded to mold the 12-ga Receiver End Mounting Ring and the Shield to fit the contours of the 20-ga Barrel. Use small steps when applying pressure to the plastic ring and remember that the Heatshield is rigid, maybe hardened, so small amounts of pressure will reduce the chance of cracking. Two things arose that could be a problem, one was the front mount was for a 12-ga barrel and is a larger diameter, and two was if the Heatshield would slide once the shooting began, it was made for a 12-ga remember. I looked for a better way to secure the front mount and found myself on the Web again at CDM Gear (cdmgear.com).
20 Gauge Remington 870 for Home Defense
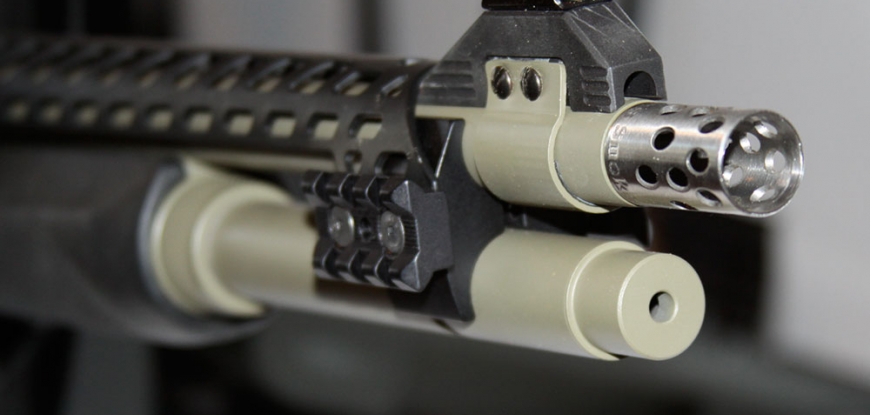
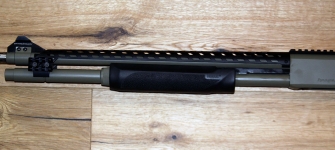
This picture shows you the mounting of the Heatshield, the rear is the same as the 12-ga except compressed, in fact I used the 12-ga Ring and squeezed it to a smaller diameter, do it slow and easy, small steps. The same for the Heatshield, small steps will produce what you are looking for.
I had already purchased a Remington Extension Mag-Tube and Nut, so I decide to find a support for the 20-ga Mag-Tube and found BMT Light Mount from CDM Gear.
A quick note about CDM Products, they are very well made, held to close tolerances and finished better than any aftermarket product I have used to date.
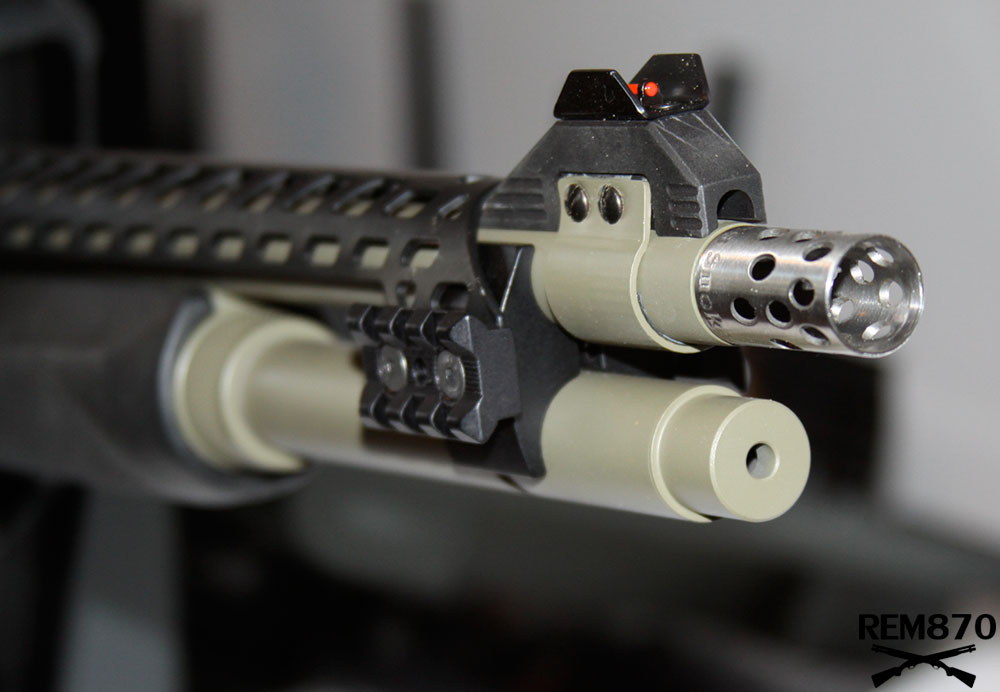
OK back to my story, I contacted CDM Gear and got their “ BMT Light Mount without the 3 slot rail for 20 gauge shotguns”, a great piece. I didn’t know at the time but the width of the BMT Light Mount was a little wider than the front mounting point for the 12-ga ATI Heatshield, wow what a surprise all I needed to do was stretch the front apart some and slide it over the mount, not that easy but close. I did spread the mount in the front but had to bend the mounting tabs, the lower portion of the Heatshield’s Front Mount, inward to lie flat against the BMT Mount, and modify the Heatshield Mounting Holes by slotting them 1/8” each, the front slotted to the front and the rear slotted to the rear. After the bending was completed and the holes were slotted and aligned to the BMT Mount, the Heatshield slid over the mount and fit like it was made for it. Now how do I secure it to the CDM BMT Mount ? First try was the mounting hardware I got from CDM but it left too much of the modified holes showing so the best idea was to use something to cover up the holes, back to CDM Gear and see what they had that fit the BMT Mount. The CDM Side Rails looked good and bolted directly to the BMT Light Mount, these are three slot rails and should cover the holes and also they will squeeze the Heatshield between the Side Rails and the BMT Mount for a good solid fit. I contacted CDM and ordered two Side Rails and they arrived quickly and covered the modified holes and jammed the Heatshield in place as originally thought.
The Three Slot Rails are well made, as expected from CDM, a quality piece.
20 Gauge Remington 870 for Home Defense
As you can see the fitment of the CDM BMT Mount is flawless. Tight tolerances and good machining produce a perfect fit as you can see in the picture. Using the BMT Mount to mount a Heatshield was not the intension of CDM but it worked out better than I had hoped.
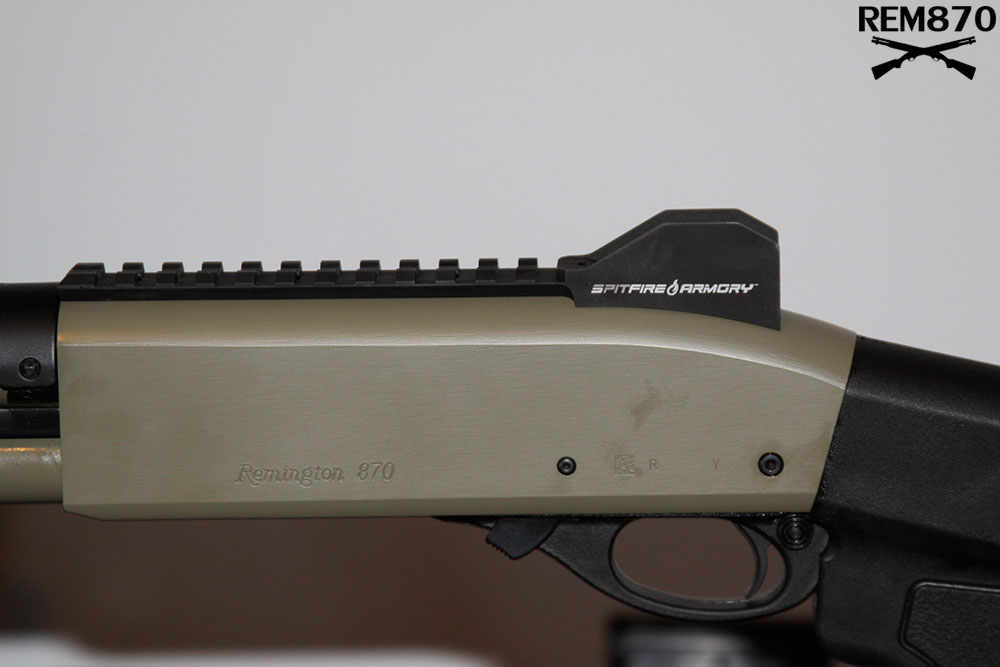
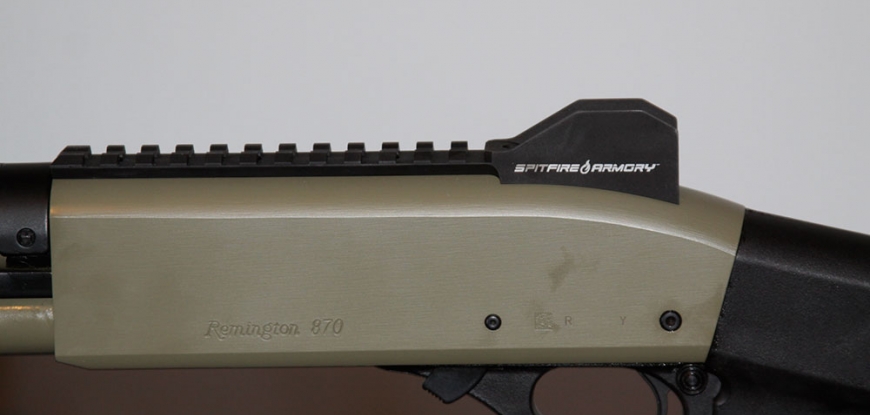
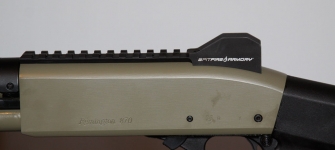
Heatshield secured, looks good but now my OEM front sights were blocked some, I didn’t like the look… ! I was looking for a new front sight and ended up finding a site called Spitfire Armory (spitfirearmory.com), good people there but as we started talking they did not have any sights for a 20-ga shotgun; I was told there isn’t enough call for the parts but they are working on a 20-ga front sight, I understood but wasn’t happy. The owner talked to me and told me he was working on front sights and if I wanted to try the prototype out we can work something out. He also suggested using the 12-ga rear sights,12-ga on a 20-ga, this won’t work, right. Well the owner took the time to find a 20-ga REM870 locally and test fit the sight and as we both found out the taper of the rear of the receiver is the same on both the 12 and the 20-ga guns or at least close enough that the Rear Sight fits without any noticeable gap and it had a front rail that is attached, fit the front portion of the receiver between the rear sights and the front of the receiver.
The front prototype sights fit the 20-ga barrel tight and should not move and raised the front sights to match the height of the rear sights dead-on.
Both sights were machined very well, no machine marking, no sharp edges, look great and give the 20-ga a new look. The Fiber Optics used in these sights are bright, brighter than the Tritium sights on my 9mm and although they may not be as bright at night but you can see them with any dim light source so I think they will work.
20 Gauge Remington 870 for Home Defense
12-ga Spitfire Armory Rear Sights on 20-ga Receiver ! As you can see the rear of the Receiver was the most concern and the 12-ga Sights from Spitfire fit like it was made for it. The Fiber Optics are BRIGHT giving you a great sight path.
Two problems came up when fitting the Heatshield, one was the bead on the front of the OEM Barrel, and two was and interference fit between the front of the Heatshield and the Front Sight Pedestal, what to do ? I didn’t know that all that was needed to remove the bead was put a pair of pliers on it and twist but that is how it happened, gone, the interference fit, well that took a little extra work. A file and some slow filing on the Pedestal and the fitment issue went away; remember small steps works the best. Since I needed to clean up the barrel to attach the Spitfire Front Sights I decide to make it a little more fancy, Cerakote would work and my local gun shop did the process; off to West Coast Ammo !
To be honest the Cerakote Process took longer than I expected to complete, what doesn’t these days, but West Coast made it up to me in spades. The coating looked great, the front of the barrel had been cleaned up for mounting the sights, any blemishes were cleaned up and all was good.
Since I purchased the Remington Extension Tube and Nut I needed a new follower and spring. I checked out REM870.com for suggestions, found the S&J Hardware No-Jam Follower and Spring and checked out reviews and found both pieces had good reviews so I purchased them. The follower is a well-formed CNC Machined part, made from Dupont Delrin Plastic, clean, no ridges, fit the Mag Tube and slides inside the tube without any binding, a nice piece. Also, the Follower is self lubricating and impervious to all types of solvents, nice ! The Spring, what can I say, S&J Hardware sells them and got good reviews from the Web and it was suggested by the them, so I got that too. Both pieces fit and worked great.
20 Gauge Remington 870 for Home Defense
I am reposting this picture so you get the overall appearance of the Olive Drab Cerakote. The gun was sandblasted, blemishes removed and the coating applied… Nice work West Coast Ammo.
The gun was taken apart for the Cerakote Process and had to be completely reassembled, sights installed and aligned (I still need to sight the gun in) but it shoots well, easy on the shoulder, the wife likes it (a plus) and it is light enough in weight and small enough to handle around the house without worrying about banging into things and it can fire #4 Shot, I don’t want to get in front of it when it goes off !
I had West Coast Ammo’s Gunsmith do the assembly of the gun after the Cerakote Process. The gun was at the shop, the gun needed the front sights aligned and secured and they wanted to see it done ! I was happy to accept their offer and ended up with a great looking and shooting 20-ga Shotgun !
Last thing to mention is the Barrel Machining, it was done by R&D Custom Barrel Service, www.americhoke.com, the owner Bob Day was easy to talk to, listened to what I was looking for and made a few suggestions, one of which was in reference to the Extension Tube use, I had forgotten about the dimples in the OEM Mag Tube, attached to the Receiver, they needed to be removed to use the 2-rd Extension. He also threaded the front end of the new barrel for Choke use, and did a little internal Cone work. All in all R&D Custom Barrel Service did a great job with a good price, fast turn around and shipping.
Any questions about the build… ask, because I am sure I have forgotten something !
Any questions about assembly or disassembly… ask the Site Guru’s or check out the How-To’s !
NOTE: I need to set some boundaries, I am new to Shotguns, mechanically inclined yes but still do not know all of the terms, the processes of assembly and problems that can arise, so please… if you do not know how to work on a REM870… get advice from the Site (REM870.com) or have a Gunsmith do it for you as I did for reassembly. I did use REM870.com for information to install all of the test pieces before the build actually went out for Cerakote so I know the info/How-To’s on the Site works.
Thanks for reading !

build comments